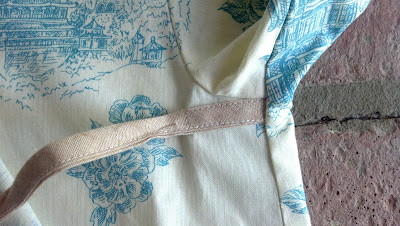
The fabric was one I had on hand and had purchased from JoAnn's. I love the vintage-like Asian toile in that yummy deep sky blue. The 100% cotton bias tape I purchased from Superbuzzy. It was a little pricey, but definitely just what I wanted.
I Spy moment.... Do you see that pin that I left in the back?
I used two different patterns for the top and bottom. I liked the tucks on the bottom of the Vogue pattern pants instead of the cuffs on the bottom of the Simplicity ones (they seemed bulky). Both patterns are currently sold in stores.
I made the inside of the bottom band contrasting instead of the front as the pattern suggested.
See how sweet the tucks are?
And I loved the pattern idea of top stitching a portion of the tie.
♥♥♥
This contrast edging on the bottom of the pajama top is not part of the pattern design. It's a little something I came up with during construction. The pattern instructions have you sew a facing to the bottom edge of the pajama top which will then be turned up and top stitched at the seam line where the bottom band meets the body (photo five pictures above). Instead of pressing under the edge of the bottom facing with a 5/8" seam allowance, I only pressed a 1/4" seam. This meant that when I turned up the facing band (brown print fabric) to cover the seam line, it left a little fabric showing at the bottom edge because the facing piece was a little too long. Finally, I top stitched between the toile and the brown facing fabric. [If your brain is mush trying to visualize all of this, I can post step by step photos!]


How lovely. I love kimono style tops
ReplyDeleteThank you, Wendy. Oh, how I love kimono tops, too!!
Delete